What a Year! Amazing Design Projects and Travel Filled Life of 2024... Thank You for Being Part of It!

I want to start by sharing how grateful I am and to thank you all for trusting me with your projects! So here is a fun recap of some work and play. As with everyone, life is not always peaches and cream — and there were some not so great moments, funerals, hospital visits, missed flights, water in the basement, weird rashes, elections…and all the other moments in life that get you down or throw you a curve ball. But our family and team are choosing joy — so we are sharing some highlights!

JANUARY!

Working away on the Retro Motel Makeover in Maine… coming together! Opening this Spring/Summer 2025! Follow Camp DeForest for more info!

My crazy drawings… but they get the point across…

I cannot wait until you see this place. Who needs closets? We opened up the large closets and created a mini-bar area! So excited!! Plan a trip to Maine this summer!

I was back at Main and Mountain Bar and Motel, to liven up the lounge areas of the bar (five years ago we did a simple budget-friendly design of this area — now we had some time and $ to give it a good facelift). Beyond thrilled how these spaces came out. They have some of the best cocktails and food in the entire state, not to mention, now some of the best design. If I do say so myself. :)

I love vacation rentals. Simple and cozy in Vermont.

From chilly Vermont to warm Florida, enjoyed working with Manasota Beach Club. Lots of fun working on the lovely refresh. It was so fun to just move the pieces around, add some paint and show off their family heirlooms.

Before Picture. Everyone always thinks my job is so glamourous. Ha!

Then after the busy time at Manasota Beach Club, my parents drove up from their house in Florida and picked me up (just like I was a kid again) and I got to spend some lovely quality time with them. I’m so lucky to have them in my life. It is truly a gift.

I’ve been making some fun coloring pages… and of course, I made my Mom test a couple — cause that’s what Mom’s do. I’m thinking about putting a coloring book together. I’ll keep you posted.

And of course, we cannot forget Basin Harbor renovations. Every year for over 10 years, in the middle of the winter, I’ve redesign a few cottages. So when you are there in the summer, swimming in the lake, playing pickleball, golfing, reading on your porch of your cottage, lounging by the pool… take a moment to think of me — freezing my butt off in the unheated cottages in the middle of the winter!

After picture. Each cottage is unique.

FEBRUARY!

Spent the entire month of February in California - loved every minute of it!

Gabrielle moved there in November 2023 for her job — and in Jan got a 2-bedroom apartment — while looking for a roommate — we stayed with her. I cannot tell you how much joy that brought me. I’m getting the hang of working remotely. Visited family in L.A., visited clients near Palm Springs and enjoyed many walks on the beach, some great meals and warm weather! What a month of memories.

Weekends away were super fun!! Including Joshua Tree! Incredible!

YUMMY!!!

The universe must have known I was in California. I got a call to work on a Motel in Northern California. It was a quick turnaround, budget-friendly project — so I enlisted my twin sister, Rosanne Palmisano, who works with me on quite a few projects. Together, I think we knocked it out of the park working away from my daughter’s kitchen table!

This project proves how much you can change a room with paint, wallpaper, art and bedding. The custom pillow really adds the final touch. We kept the beds, headboards and side tables and many other features…because this was just a refresh and a very snug budget — but when you see the BEFORE and AFTER, you will be amazed.

If you find yourself in the Mt. Shasta area, go stay at the Angler Lodge!

Anyone have a California project I have to do for 2025?

MARCH, APRIL, MAY

What an spectacular project— helping friends redo their condo — which was once a church! After a year and half of construction, we were able to style and photograph the project. With one on my dearest friends, Karin Lidbeck-Brent, who happens to be one of the best magazine stylists in the nation — and the talented photography team, the project is revealed! Great story in Modern Luxury Magazine out of Boston.

Then there is Basin Harbor cottage install…

Material Selection for the new build Post and Beam in Vermont. Great clients — knock your socks off — project. More coming soon. Finishing this beauty up in December.

Then there was the sailing trip to the Grenadines with Friends.

My friends should know better by now. “Hey, let’s walk from one side of the island to the other then up over the mountain back to our boat.” So what if it is over 100 degrees. Okay everyone, try not to look like you are going to kill me. Smile!

Three projects in the middle construction. The team is on it. Perfect time to head to Italy. This trip I am traveling with my twin sister, actually house hunting (or should I say — tiny apartment, shed or something that is going to cost very little money). Sadly, no luck on this trip. Andiamo!

I always get inspired when I’m in Italy. Not sure if it is the pasta, wine or coffee, but it seems to work. #workingremotely

Amazing antiques are everywhere!

Rosanne plans 90% of our trips. She is just better at it. And she finds some of the coolest places. She jokes about starting a YouTube Channel on Italy travel advise. So follow her on Instagram. https://www.instagram.com/rosie_josie_travels/ Message her to tell her to started!

If we ever do get a place in Italy — we will let you know ASAP! Here is Rosanne contemplating the amount of work this place would take. I said — just leave the tree growing in the bathroom — instant decor! Needless to say — we sadly, passed on this beauty.

What we love about Italy (or one of the many things) is we walk so much! So these beautiful plates of pasta are not only tasty but necessary for our calorie intake!

Back home hit the ground running shopping for clients. This beauty is now part of a bar in a new build post and beam home — photos to come soon! :)

JUNE, JULY and AUGUST!

Signing books never grows old!

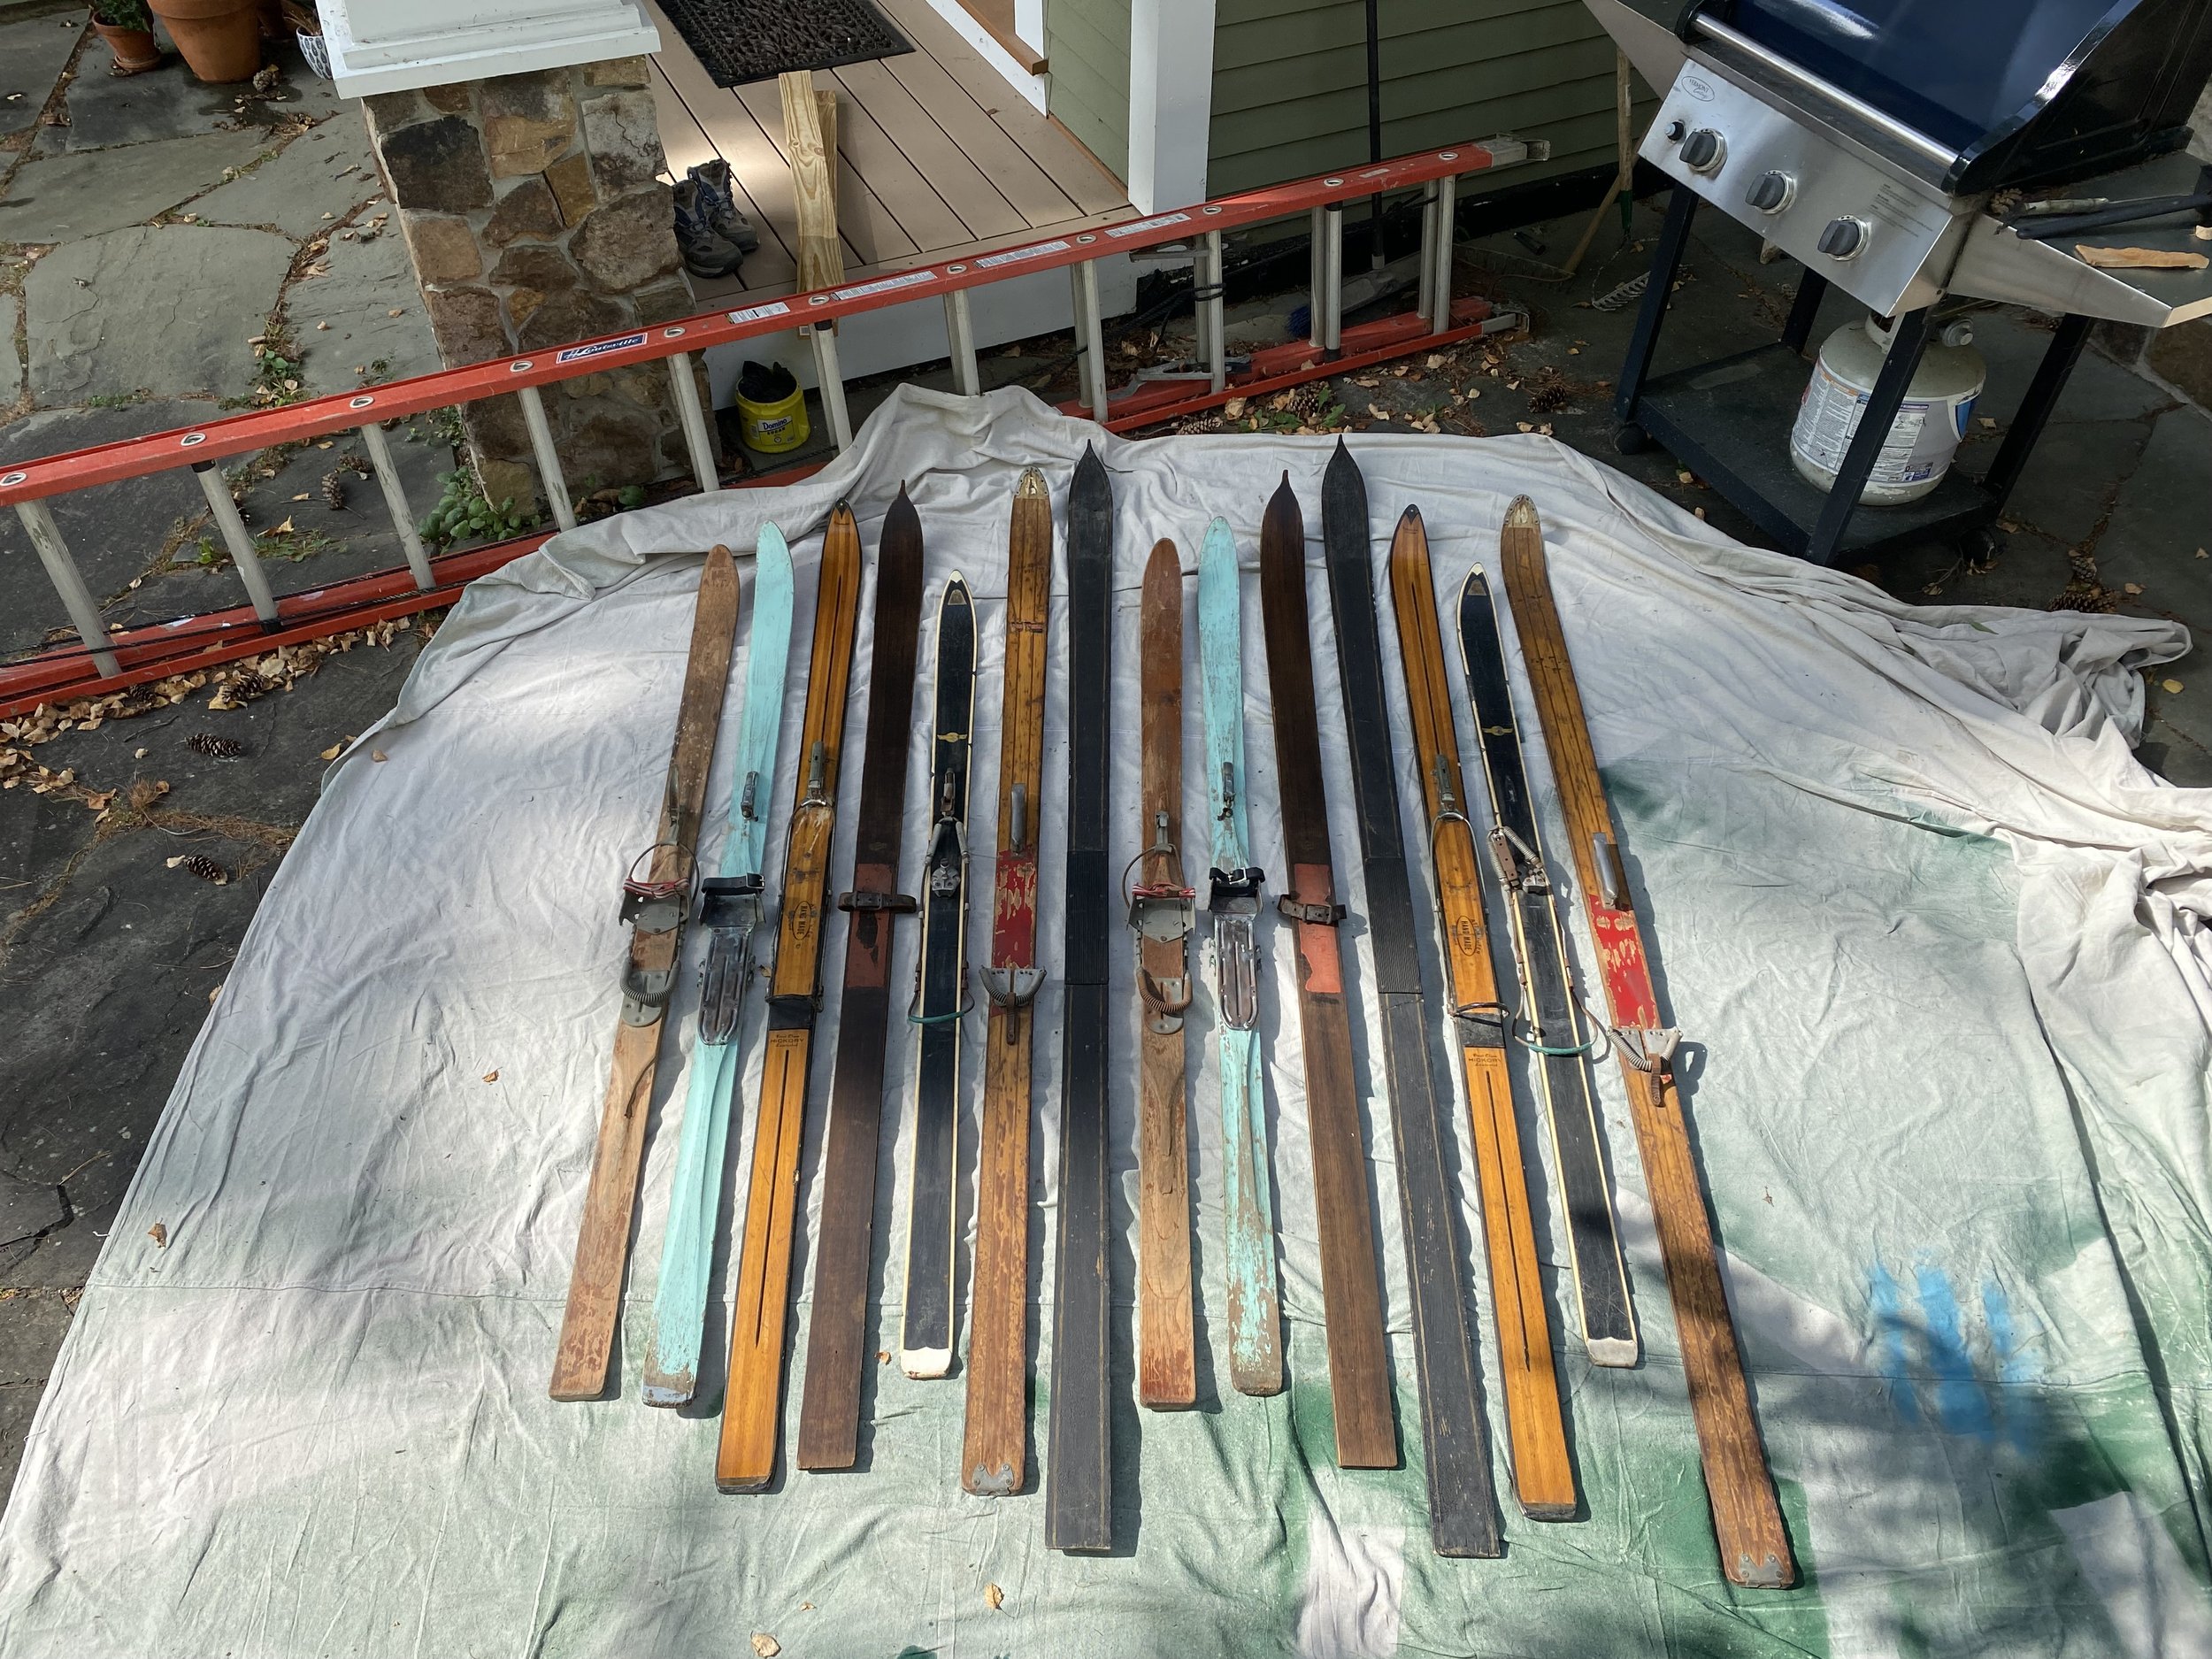
Collecting vintage skis for a DIY project for a client.

And of course I’m crafting, every second I get a chance. Here I am testing a craft idea for my annual ladies night craft gathering. :)

Gabrielle (on the right) brought home five of her dearest friends. What a joy to have these beautiful and kind ladies in our home. I could not ask for more.

Picking out wood with Josh at Schwa Custom Woodworking! These pieces of old barn board from an early 1800’s barn are incredible — but not easy to work with. Thank you Josh for making the effort! Ten foot dining table and 4’ square coffee table — just two of the beauties that are coming out of these babies!

TADA!

Sunsets in Vermont… Pinch me moments almost every night in the summertime! (Neighbors boats) :)

Getting our farm share every week is like Christmas. Thank you Head Over Fields!

September and October

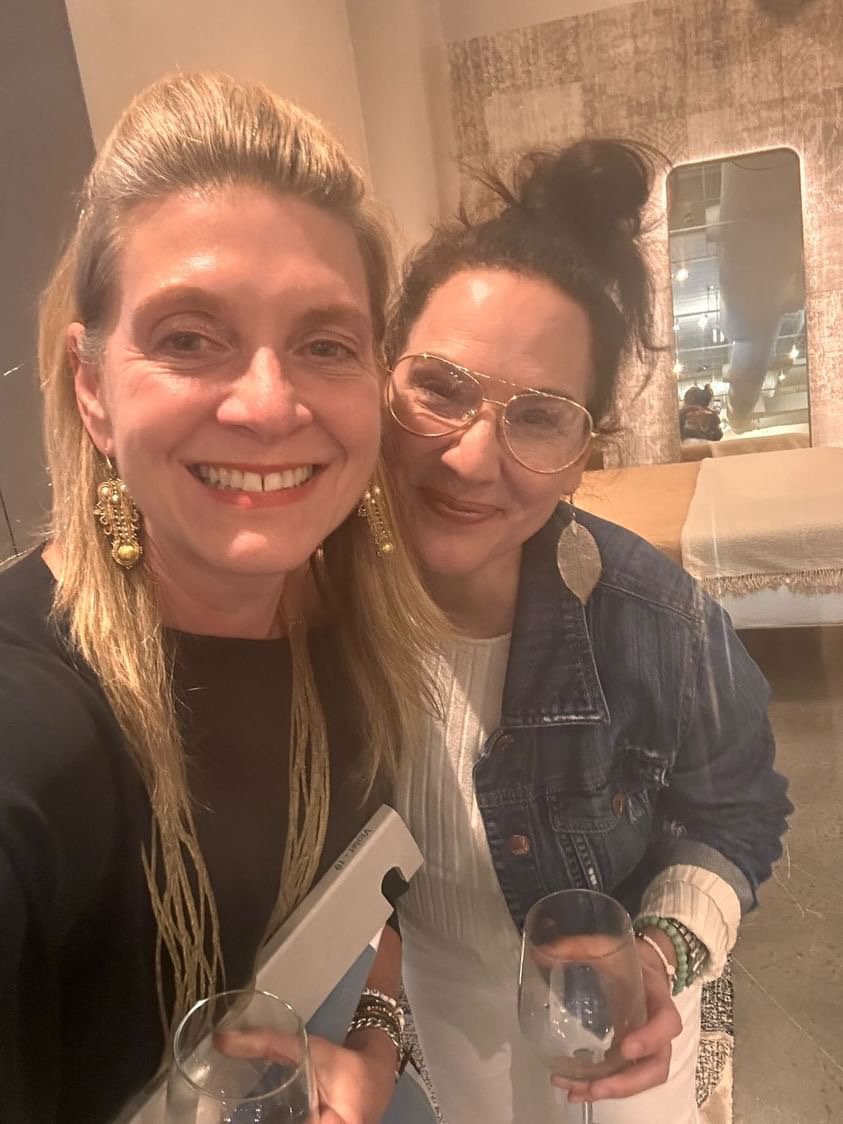
Road Trip to see my BFF and another dear friend in Oregon. Laughs and Crafts and lots of Design Work in McMinnville, Oregon! Because that’s what we do!! Trips to the Goodwill Bins, Second Hand Shops and Rebuild Centers — that is what brings us joy! (Okay… full confession… here we are at a wine tasting to celebrate her big birthday.) Shannon Quimby is not only my best friend, but one of the most talented stylist, DIYer and Designer I know. Grab one of your favorite magazines and you will probably see her name as the designer and/or stylist! Now… she is creating this amazing vacation rentals homesite in downtown McMinnville - wine country Baby! Follow along — so you can be one of her first guests when it opens! Hoff Homestead!

Then I zipped up to Bend, Oregon with another close friend to help her with some house projects to get her house ready to go on the market. This is one of my favorite places on earth and will miss sitting along the edge of the canal watching the sunset with a glass of wine with her. But wherever she goes — will be home.

My first time ever to High Point Market. Hard to believe. Meeting with old acquaintances and meeting lots of new folks in the industry made it all worthwhile. No, it was not all wine and tasty treats. Thanks Jana for helping me navigate this huge show!

I couldn’t believe I had to go all the way to High Point Market to find out about an crazy awesome rug company based in my home state of Vermont! Asia Minor Carpets! Wow!

I’m sure it does not surprise you that our team spent most of our time in the Antique + Design Center at High Point. Not only that, but we got to hear the most amazing talk from Toma Clark Haines, the Antiques Diva. We may know lots about salvaged material, but it was wonderful to learm more about antiques, their styles and how to make sure you are getting the real deal. Thanks Toma! Hopefully, we will meet up in Italy sometime!

Back at Basin Harbor… time to do a few more cottages! Part of our job is to not only come up with designs for the renovations but to make sure that all the materials that are being removed are reused (employee housing, rebuild centers, habitat for humanity, etc.) or recycled. Yes, contemplating a dress or skirt — a Sound of Music moment!

Working with friends is always the best. A fun design project — update furniture install job at Sugarbush Resort. Having to go through over 61 units and make sure we had the correct measurements for everything.

And in between all the travel and work, I asked for Christmas a HOT ROCK SAUNA. And Steve said YES! So for two months he has been drawing, designing and building me a beauty! He is the best DIYer I know! Beyond thrilled.

Remember the vintage skis earlier in the year? Here they are in place!

LOVE LOVE LOVE Original Concepting… working with owners and Kim Deetjen (one of the most talented interior designers in the hospitality industry) on concepting for a hotel. More to come.

More Shopping for Clients at Champlain Valley Antiques.

More Shopping… Mason Brothers Salvage!

What!?! Is it November and December already!

You guessed it! Back to Italy — House Hunting. But first, Scrabble. Don’t forget to follow Rosie and Josie Travels to see more of our adventures.

November in Italy.

A bucket list trip….Egypt. We went with Lindblad Expeditions and we would never do Egypt with anyone else. The access and special places we got to visit were outstanding!

Steve and I enjoyed ourselves immensely.

Honestly, it is a trip you cannot even explain. This is a picture I took of our two Egyptologist who were with us for the entire trip. We learned so much about the history and about today’s modern Egypt.

Egyptian colors, textures, textiles from 4000 years ago till today… Mind Blowing! Nicest people in the world as well! Thank you Lindblad and your incredible team.

Channeling Indiana Jones… :)

After 3 months of building it… my husband completed my Christmas Present! My hot rock sauna. Seriously — he worked so hard — drawing up his own plans, prepping the space, tiling, insulation, siding, roof and more… I’m beyond thrilled! Enjoying it!

I must confess… I’m not a great cook or baker — but my friends are — so of course I’ll join in on the cookie making party… I’ll just watch… yeah… that’s it… watch…

This is the kind of parties we throw! Craft Night!

Guess who is home!!! The best holiday gift ever!!

Thank you for following along. Our hope for you… work hard and play equally as hard. :)

Holidays to you and your family. xoxo Joanne

DIY Holiday Decorations, Crafts + Gift Ideas

I’ve added some fun Holiday Craft Ideas to this older post. These eco-friendly gift giving and holiday decor ideas never go out of style. It is never to early to start crafting — or even better — have a crafting party and make some amazing DIY holiday gifts. I know it is early to start thinking about making Holiday and Christmas crafts… but frankly, I’m ready for some JOY! Aren’t you? So I’m compiling a gazillion of my holiday crafts I’ve made over the years for DIY NETWORK, my blog, my books and more… and putting them here. I’m going to try to link as many as I can to the STEP by STEP directions for each as well. Seriously folks — we deserve homemade gifts and holiday crafting now! :) Virtual Hugs to You All. Joanne

DIY Holiday Crafts Homemade Decorations by Joanne Palmisano.png

I made these stars out of cardboard scraps, left over fabric and some ribbons… a few feathers and some twine. All you need are some scissors and a hot glue gun. Instant Christmas Tree Ornament or Gift Tag or Package Bling. :)

For these FLOWER POWER holiday treen ornaments — I raided my husband’s work room for extra electrical wire… Then I grabbed my button bin and started gluing.

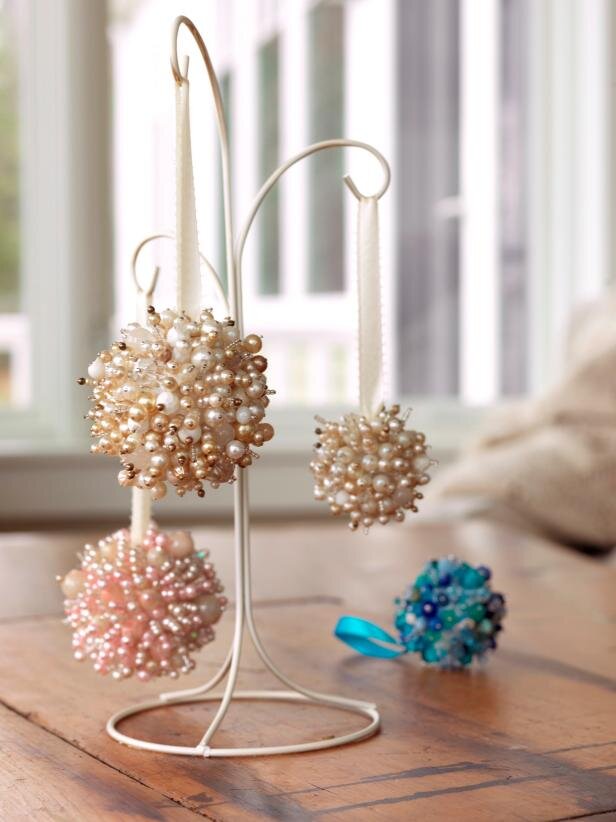
Left over costume jewelry — turned into gorgeous glamourous holiday decor.

Left over costume jewelry — turned into gorgeous glamourous holiday decor.

Birch Stick Wood Cookies with painted letters and hearts — easy magnet project. (P.S. the wood dries a bit — so add a little glue around the edging so the bark does not slip off.) Magnet Holiday Gifts are the BEST!!

Coastal Cottage Style DIY Homemade Wreath I made for DIY NETWORK many years back :)  Still gorgeous today!

Coastal Cottage Style DIY Homemade Wreath I made for DIY NETWORK many years back :) Still gorgeous today!

Cards may be on the come back this year… So plan ahead and create your own DIY Holiday Bulletin Board.

Cards may be on the come back this year… So plan ahead and create your own DIY Holiday Bulletin Board.

Front Door Wreath — Doesn’t have to be round.  Get Creative — Here I used an old frame and skate I painted. Then I spray painted some faux sunflowers.

Front Door Wreath — Doesn’t have to be round. Get Creative — Here I used an old frame and skate I painted. Then I spray painted some faux sunflowers.

Purple and White Cardboard and Pom-Pom Peace Ornaments… Super fun and simple Kid Crafts for the Holidays.

Purple and White Cardboard and Pom-Pom Peace Ornaments… Super fun and simple Kid Crafts for the Holidays.

This elegant shell coastal home holiday decoration I made for my Mom. We actually found these shells on the beach and then with a oval bowl I put the display together.

This elegant shell coastal home holiday decoration I made for my Mom. We actually found these shells on the beach and then with a oval bowl I put the display together.

One of my favs— Birch bark holiday wreath.

One of my favs— Birch bark holiday wreath.

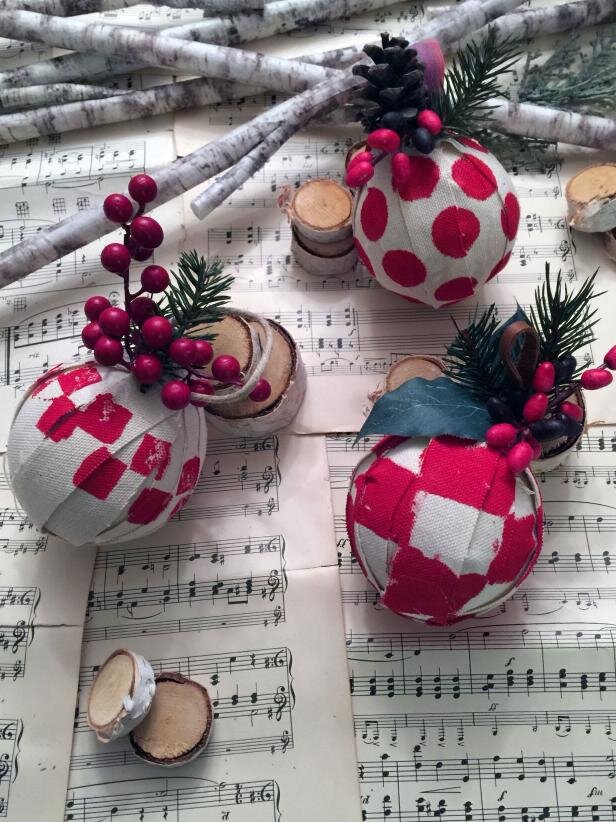
My Pottery Barn inspired black, white, red checkered wreath I made using left-over fabric — spray painted cones and some cardboard.

My Pottery Barn inspired black, white, red checkered wreath I made using left-over fabric — spray painted cones and some cardboard.

Mini Paintings for your tree. DIY Holiday Ornament Decor. I found these little frames in Goodwill and at my local craft store.

Mini Paintings for your tree. DIY Holiday Ornament Decor. I found these little frames in Goodwill and at my local craft store.

I’m a boho girl at heart. These little gift tags were super fun to make. See all my BOHO inspired holiday craft ideas I did for DIY NETWORK here.

I’m a boho girl at heart. These little gift tags were super fun to make. See all my BOHO inspired holiday craft ideas I did for DIY NETWORK here.

This is one of my favorites — and these personalized family coasters have been on my living room table for over 10 years — so they are the gift that keeps on giving… Found some white tile at the recycle center. Printed out some black and white pictures on my home’s printing — use a glue stick to place them on the tile (make sure there is at least 1/4” of tile showing around the edge). Then with a 2-part Epoxy — I sealed them. The reason I used this type of glue/sealer is because any type of beverage can go on it — without ruining the pictures. This is the PERFECT GIFT for Grandparents.

One of my most popular DIY’s of all times I did for DIY NETWORK. My handmade JOY sign holiday decor. I even saw this picture in Target’s inspiration booklet— I’m honored. :) Hand painted vintage sign!

One of my most popular DIY’s of all times I did for DIY NETWORK. My handmade JOY sign holiday decor. I even saw this picture in Target’s inspiration booklet— I’m honored. :) Hand painted vintage sign!

Scrap denim starts this fun BOHO Holiday Ornament — Handmade gifts are the best!

Scrap denim starts this fun BOHO Holiday Ornament — Handmade gifts are the best!

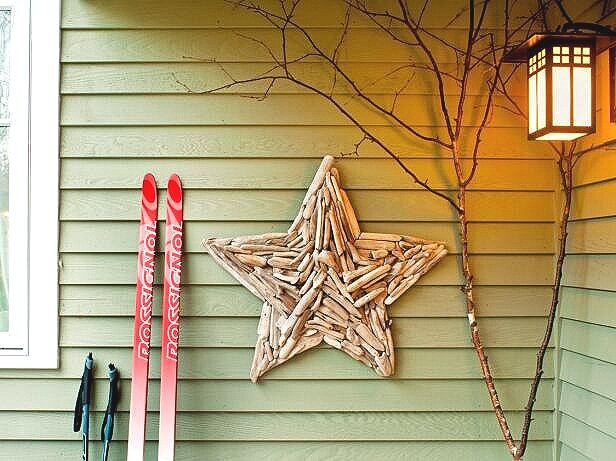
Driftwood Star painted silver

Driftwood Star painted silver

I cannot even throw away even the smallest piece of scrap vintage fabric — and luckily for me I didn’t. With some craft balls and strips of fabric — I created this amazing Christmas tree garland. What a lovely vintage look — you could do all white and creams for a more farmhouse style holiday feel.

Or you can leave it ah la natural.  Driftwood Holiday Decor, a great cottage style.

Or you can leave it ah la natural. Driftwood Holiday Decor, a great cottage style.

Seriously — reusing is as simple as a paper bag and some paint. I used these patterns to create my own gift wrapping pieces.

Well it doesn’t get anymore Country Christmas than this DIY. SUPER EASY! I used a scrap piece of vintage reclaimed wood trim (about 4” wide) and I cut them into squares. Then I sanded the edges a bit to give them a more rounded feel. With red craft paint I added some mittens and snowmen and other holiday shapes. Sealed them with some poly (you can use wax if you want) and added some felt to the bottom (you can use little furniture pads if you want).

Modern white chunky yarn holiday wreath was embarrassingly simple.  Piece of cardboard — and wrapped some chunky yarn — plucked in some white decor and feathers.

Modern white chunky yarn holiday wreath was embarrassingly simple. Piece of cardboard — and wrapped some chunky yarn — plucked in some white decor and feathers.

Then, of course, there are all the fun country cottage style holiday DIY’s I made for the Great American Country website. Including these fun red tree ornaments.

Then, of course, there are all the fun country cottage style holiday DIY’s I made for the Great American Country website. Including these fun red tree ornaments.

Okay… I think you guys get the “picture” — Holiday DIY crafts are as simple is grabbing your cereal box and printing out some pictures and making gift tags.

Okay… I think you guys get the “picture” — Holiday DIY crafts are as simple is grabbing your cereal box and printing out some pictures and making gift tags.

My pinterest page has even more links to fun ideas. Including this picket fence holiday wreath that was one of the top ten holiday ideas on DIY NETWORK a few years back.

My pinterest page has even more links to fun ideas. Including this picket fence holiday wreath that was one of the top ten holiday ideas on DIY NETWORK a few years back.

I don’t mind when some costume jewelry are missing pieces — even better! Then I don’t feel bad about stringing them up and hanging them from my tree. Look at that sparkle!

HAPPY HOLIDAY CRAFTING MY FRIENDS!

xoxo Joanne

That’s a wrap!  DIY paper bag holiday wrapping paper and birch bark gift tag. :)

That’s a wrap! DIY paper bag holiday wrapping paper and birch bark gift tag. :)

MANTEL MAKEOVER -- For Under $200 Using Reclaimed Materials!

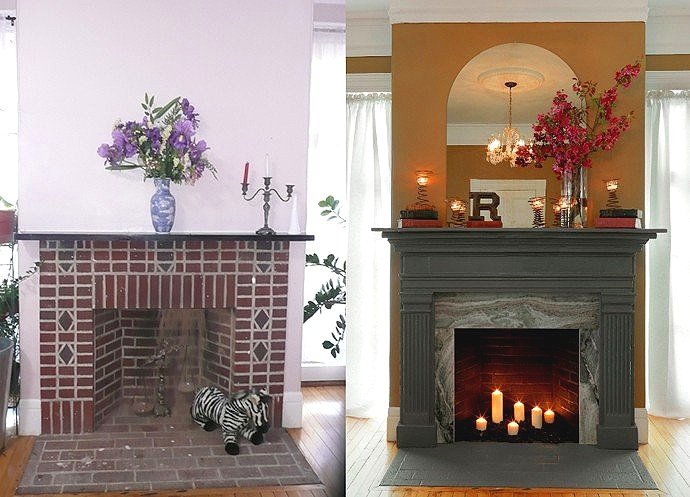
This is an oldie but Goodie! Did this project for DIY Network, but when the holidays roll around, I always think of it — because I can picture myself next to it — even if we couldn’t put an actual fire in it — it still gave off that charming fireplace feel — even without the fire! So if you don’t have a fireplace (or cannot have one — or you have an old fireplace that no longer works) you can still create that charming and inviting cozy feeling you get from sitting around the fire. xoxo Joanne

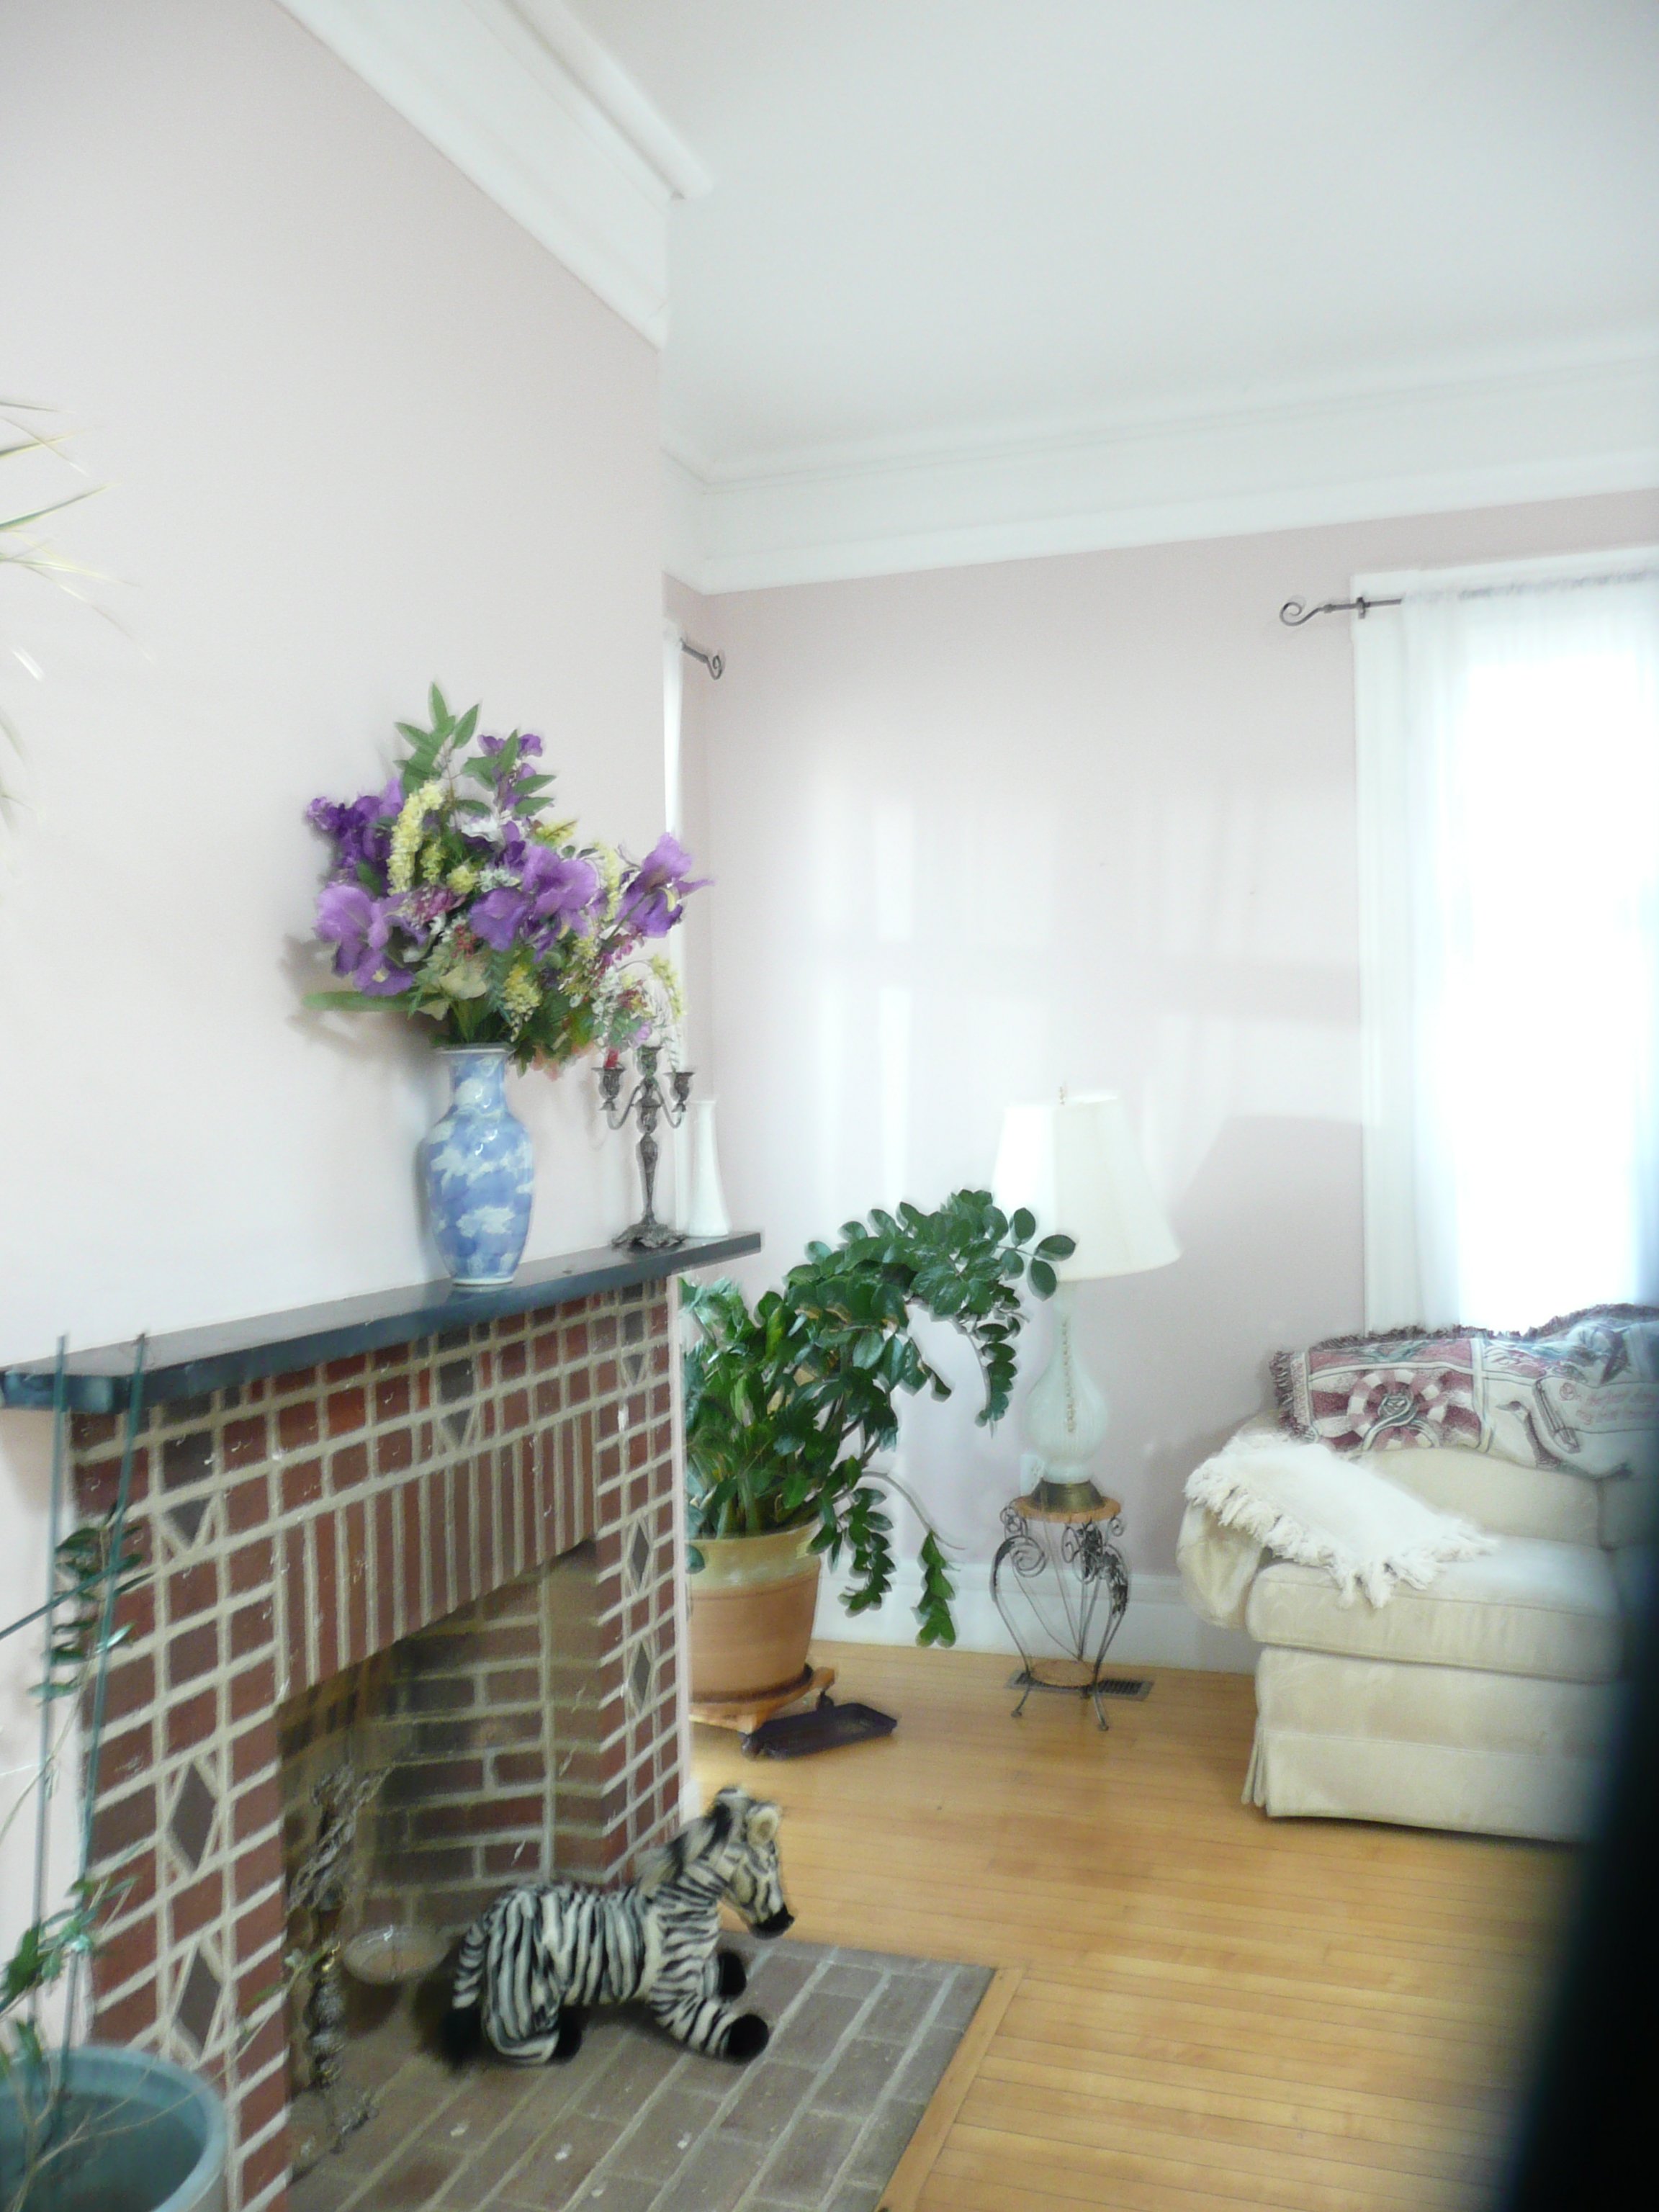
BEFORE: So this is what we started with. An outdated brick fireplace that had a very narrow mantel. The fireplace no longer was in use, but that didn’t stop us from creating a super budget friendly mantel makeover!

ANOTHER BEFORE: :)

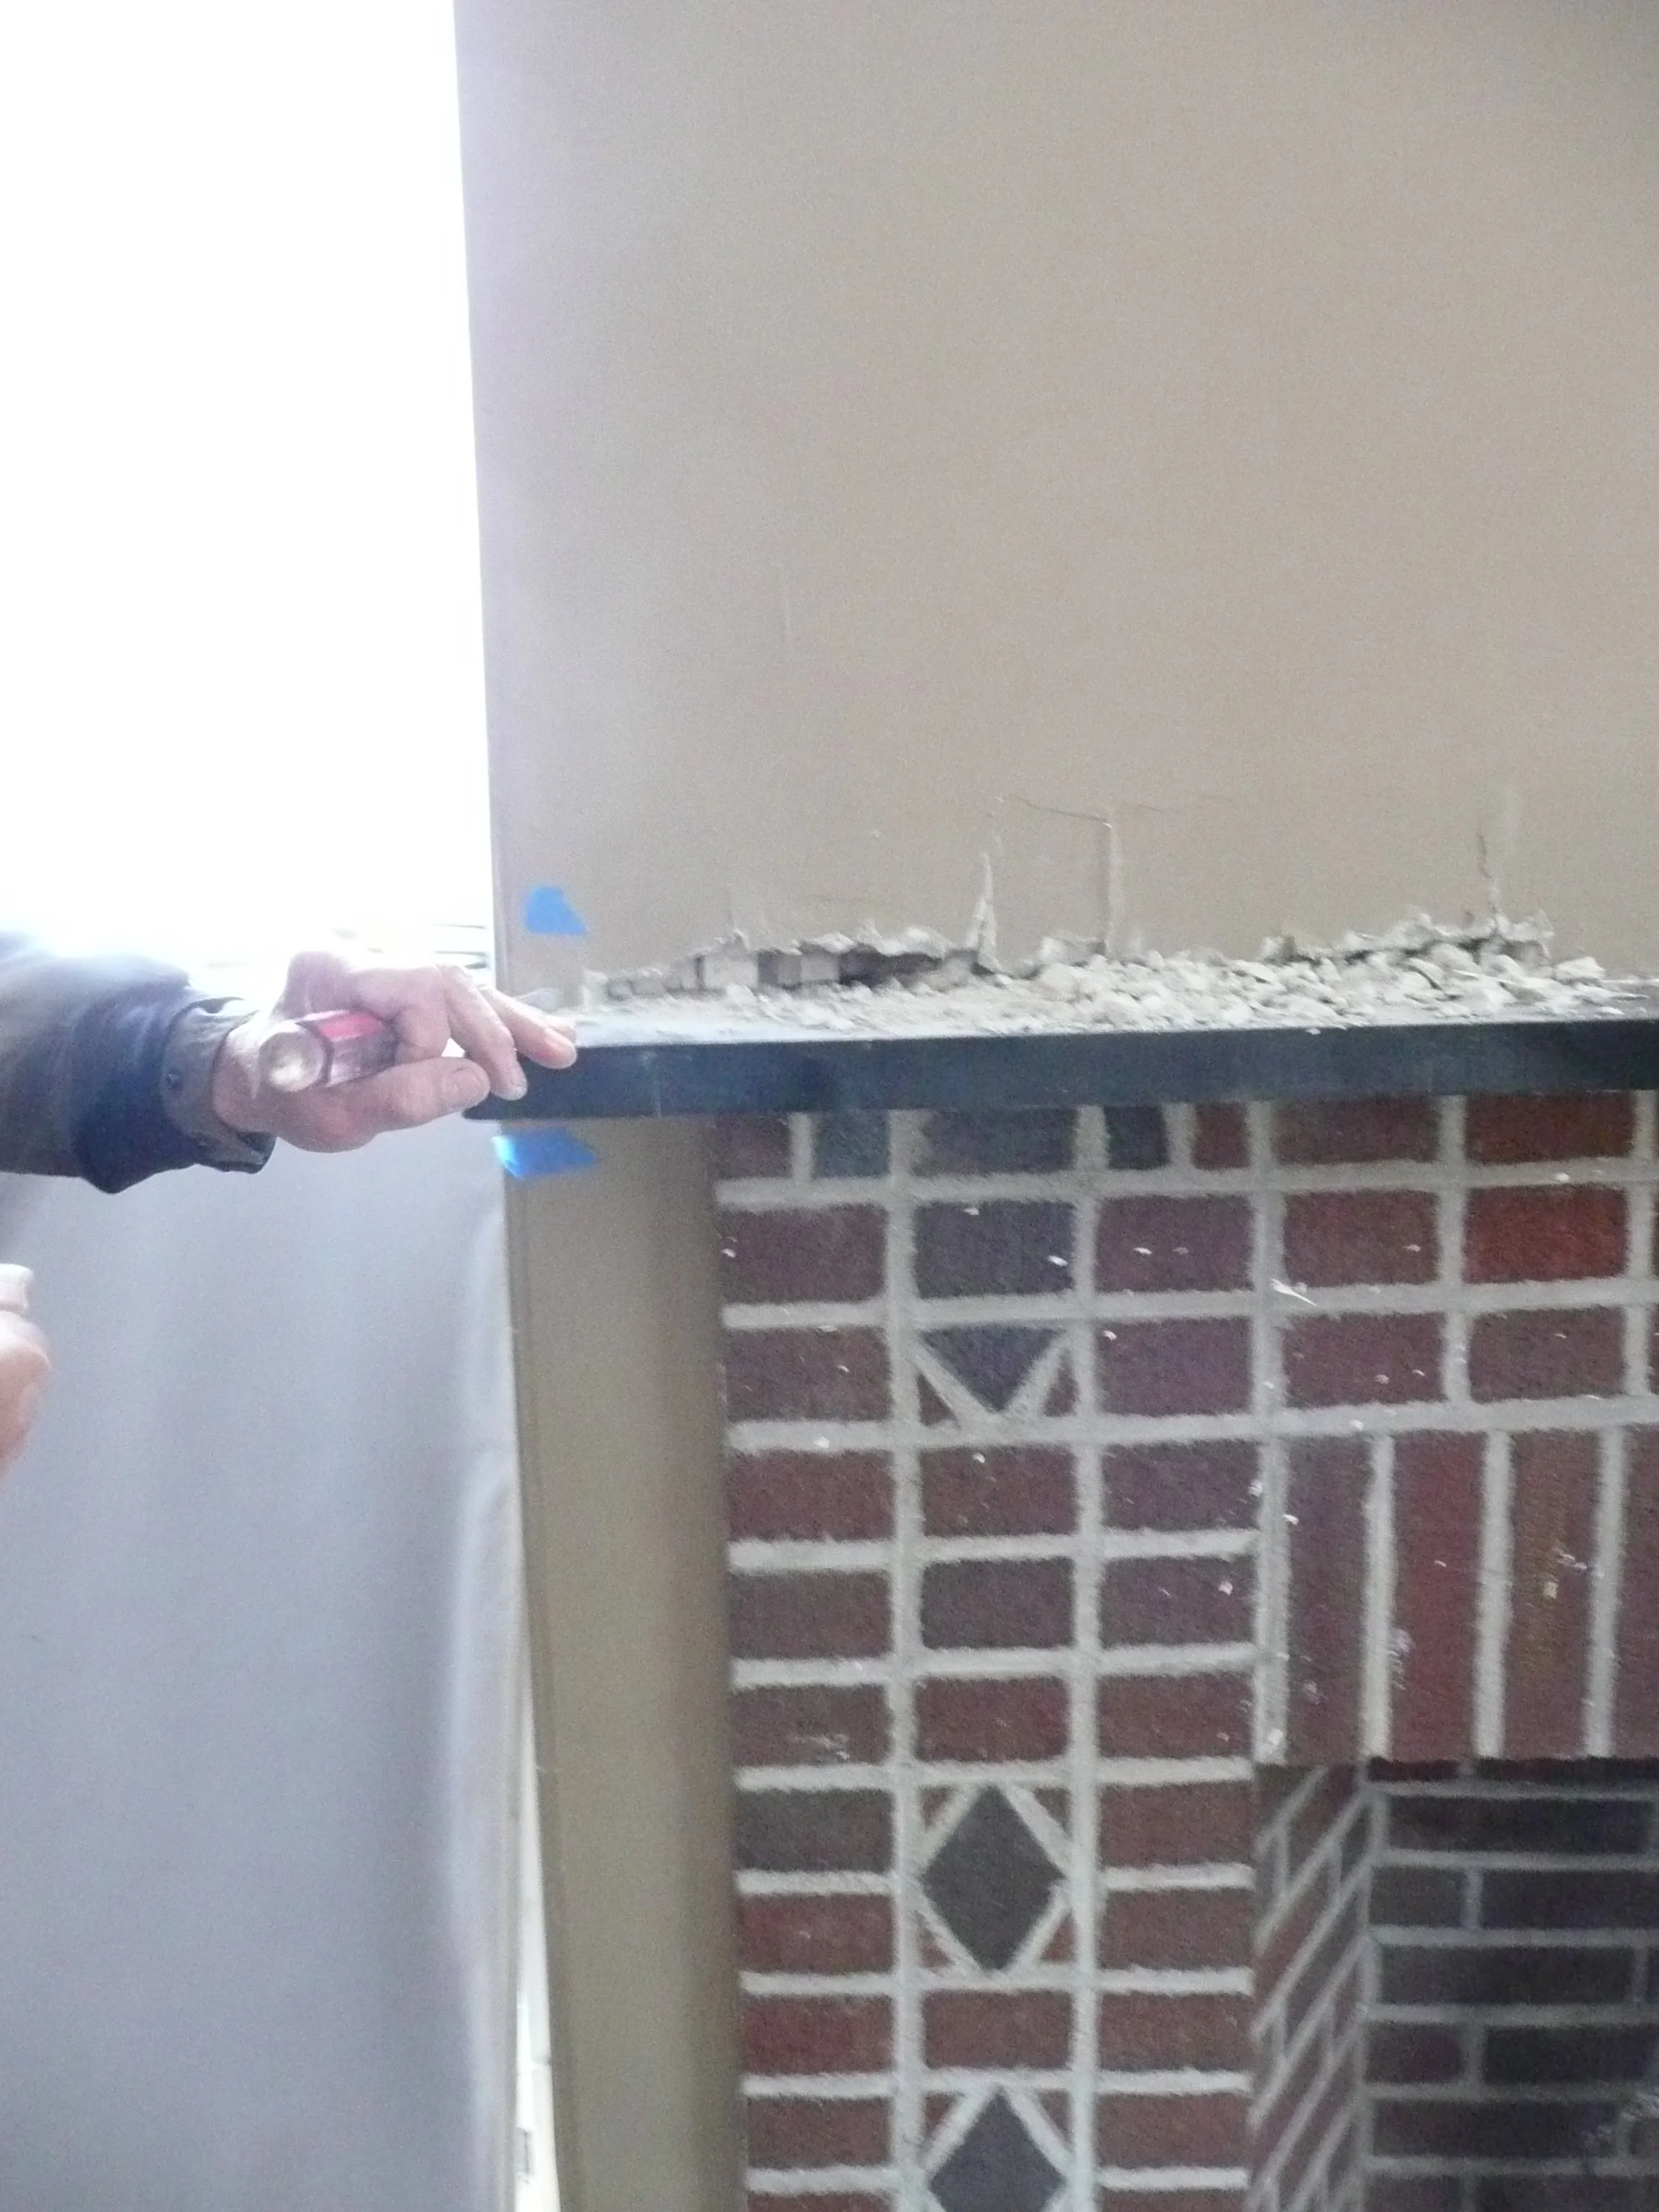
Why did we remove the old mantel… because we wanted to create a wider mantel — and we wanted to start with a wider piece of wood.

NOTE: MAKE SURE TO FOLLOW ANY CODE FIRE RULES — ESPECIALLY IF YOU HAVE A WORKING FIREPLACE.

Thankfully, we had a large brick area above the fireplace — so we could go ahead and add the wood directly on top of the brick. We

We found these left over pieces of marble at a salvage shop for about $20 each… We used them to go over the brick in the surround area of the fireplace (we needed at least 12” all around the firebox). Again, refer to the CODE requirements for your fireplace.

Make sure the brick is cleaned well — and ready for the adhesive to place the stone…

After a good cleaning — you can paint the inside of your firebox with FIRE-RATED Paint! Let dry well before moving on. You may need a second coat. Read instructions on paint carefully!

We used a frame and weights to help the marble cure to the brick — as you can see we have not put up the top piece yet — we did the side pieces first — then the top went up after a day. You have to make sure the pieces are really PRESSED into the brick.

We found this old fireplace mantel and sides at an architectural salvage shop. But you can go online and find them on many sites like ETSY, Ebay and other Second Hand Shops, or even Facebook Marketplace. Our mantel and sides was pretty much a wreck — that is why we got such a great deal on it — it needed a little bit more TLC. But you can find some beauties that don’t need as much work from $200-$500.

We added the salvaged surround… then added a few pieces of extra salvaged wood along the top as well, to make the mantel deeper. We nailed it all in place. (Again, make sure there is enough stone between the firebox and the wood part of your mantel).

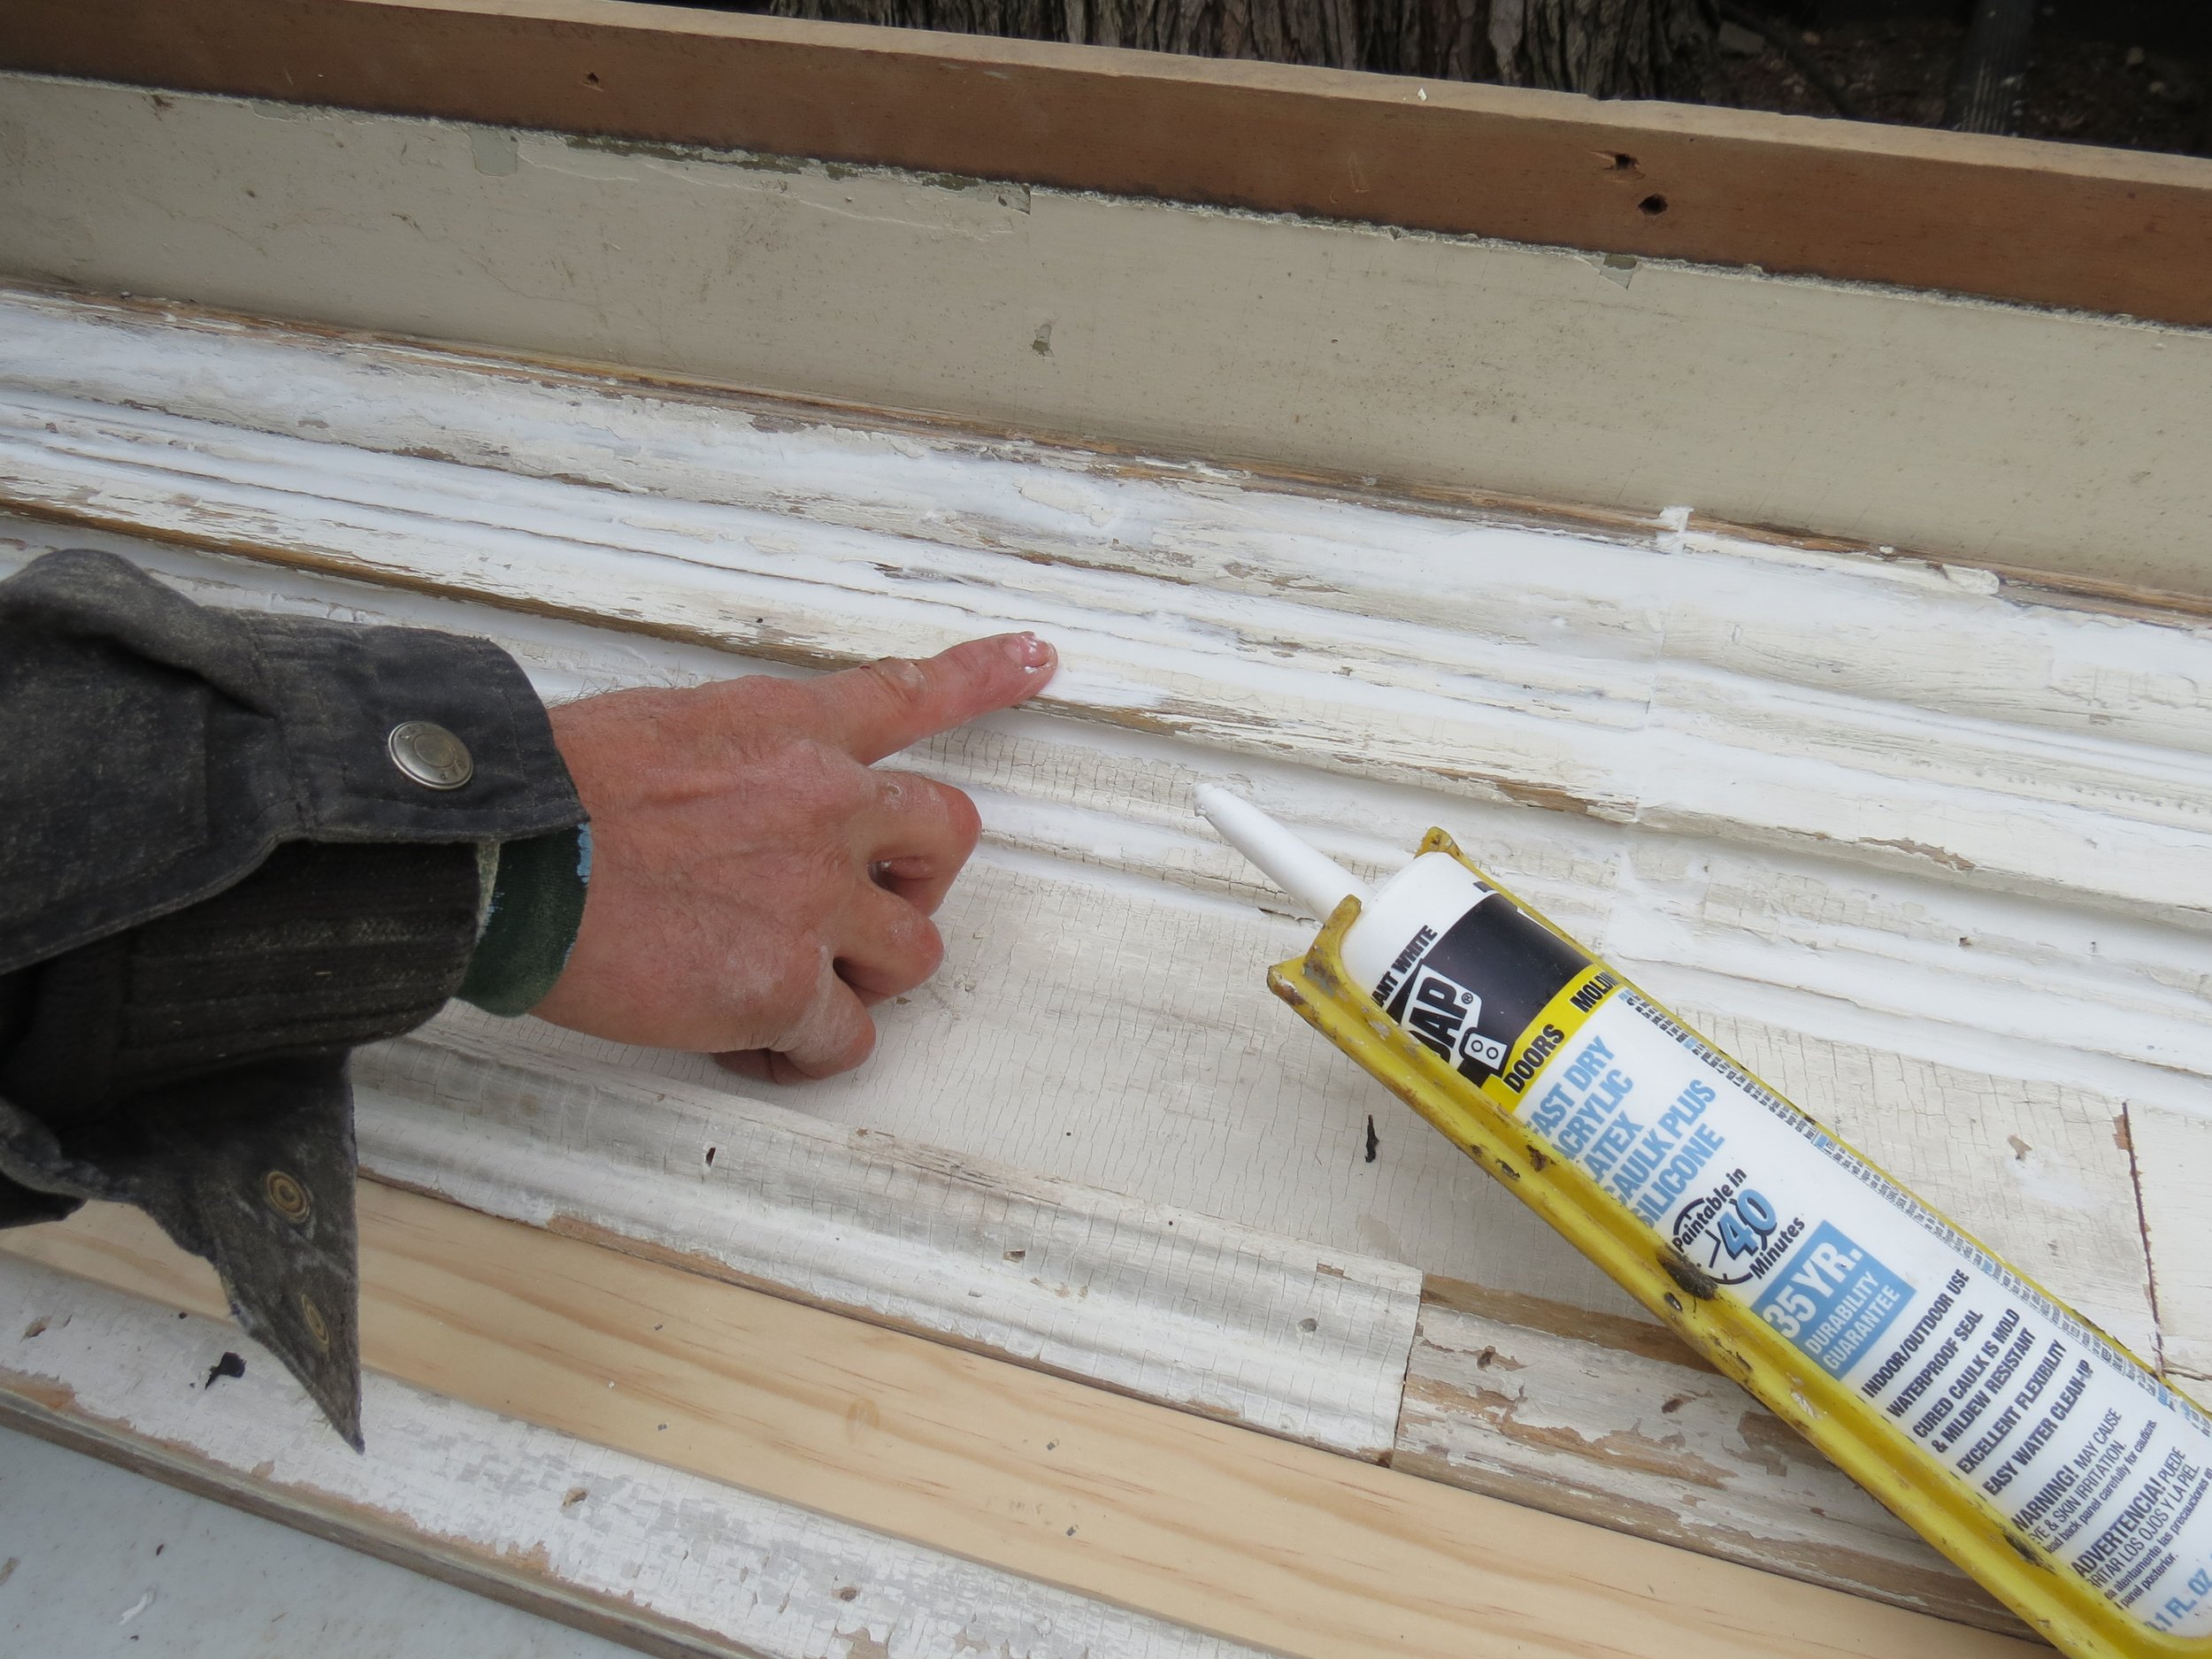
this is how all the pieces went together. We filled all the holes and caulked along all the seams. Then sanded it all.

Then I painted the entire surround.

TA DA! The completed fireplace makeover.

Then I added a $6 mirror I found at Goodwill, and some old bedsprings, books, candles and VOILA! A fireplace makeover… This is perfect in this historic home. But you can have an entirely different look by using different colors, style of salvaged trim and decor. Enjoy!

For my book, Styling with Salvage, we photographed this amazing house in Texas and in one of the bedrooms was a vintage fireplace mantel and sides that didn’t have a firebox but tiles instead. This is a great way to create a focal point in a room without actually having a fireplace.

Hope you enjoyed this project. For more fun DIY’s check out my books.

RECLAIM IT! WOOD - EASY TO USE DESIGN + DIYS IDEAS and MY FAB 3 WAYS TO USE IT!!

Let’s Talk About Wood… Baby…

Here are my 3 FAV ways to reuse wood in design and decor in our homes and businesses.

  • RECLAIMED WOOD LUMBER (Vintage, Reclaimed and Urban)

  • RECLAIMED ARCHITECTURAL SALVAGE (Doors and Trim and More)

  • VINTAGE/ANTIQUE WOOD PIECES (as Fixtures, Furniture and Decor)

After 25 years of working with salvage materials for myself and others — I want to share some easy ways you can use it as well. If you want more… my books are always available to you at your favorite bookstore or online Also — please sign up for my mailing list — once in a while I’ll send some really cool ideas and giveaways (once or twice a year).

Here I am — checking out wood at my local Rebuild Center… I mean — look at these boards!! Swoon worthy!

RECLAIMED WOOD LUMBER…

There is reclaimed wood from an old building that came down (usually amazing hardwoods you cannot even find today), then there is left-over dimensional lumber from somebody’s project that they dropped off at the rebuild center, then there is urban lumber (trees in a city that have to come down for a variety of reasons — that are usually unique species that are super special)… and that is just to name a few different types of reclaimed wood.

Let’s start small… this homeowner found these boards washed up on the shore and she painted them in beach cottage colors. She left the edges as she found them. This whole house is an amazing example of how to use reclaimed wood lumber in a variety of ways. She just cleated this DIY headboard to her wall. We photographed and styled it for my second book, Salvage Secrets Design + Decor.

Love this example of a house we photographed at one of my favorite designer’s cottage. Designer, Jessica Helgerson, shows us how using reclaimed wood does not always have to look dark or shabby — here she used reclaimed wood in a natural finish on the floor and white on the walls. An exceptional example of how reclaimed material can be any style — it just depends on how you use it and finish it.

Old reclaimed lumber doesn’t have to be used just on floors and walls or headboards — here is a custom designed vanity piece that I had created for a client. This wood is from a 1700’s barn. The depth of character is hard to describe. The custom carved marble sink that sits on top is in perfect modern juxtaposition of the rustic wood style of the vanity base.

Barn doors are super simple to make — what I love about barn door sliders is that in small areas, they really help you save space! Not to mention, the amount of character you can add to any room. These we left in their natural barn wood color (used to be outside on this old barn). But imagine these in a bright blue or pink in a seaside cottage, or a high-gloss black as a pantry door in a modern house… endless I tell you, endless…

Same project — different door — again saving space where it was really needed! Super fun turning an old barn into a vacation home. This Modern Rustic Luxury Vacation Home was an incredible project — what I loved is reusing the old barn siding in a variety of locations on property including as the sliding doors to the rooms and bathrooms.

RECLAIMED ARCHITECTURAL SALVAGE — DOORS, TRIM and MORE!

To tell you how much time I spend in Architectural Salvage Shops and Reclaimed Building Stores would be a bit embarrassing. But worth every second. The treasure they hold are incredible and we have to appreciate the amount of time it takes to deconstruct the buildings and bring these treasure to us. I’ve used

In this image alone I can point out numerous items you will find at an architectural salvage shop. The farmhouse table, the vintage chairs and the newel post (plus light and decor…). This entire home is featured in my second book, designed by the homeowners themselves. This simple farmhouse style shows how you can really incorporate reclaimed architectural bespoke elements and still have a contemporary feel.

This is one of my favorite — easy — game-changing — diy — headboards! Grab some old wood cabinet doors from your local salvage shop or rebuild center, place them on the wall behind your bed — screw them to the wall — fill the holes and then paint it all in a modern contemporary color that fits your style! Voila — SUPER EASY BUDGET-FRIENDLY HEADBOARD!!! All made from reclaimed wood cabinet doors. Blushing…

We featured this entire home’s budget-friendly design ideas for your vacation rental in our book, Rock Your Rental and it was featured online on Domino, Apple News, Vermont Ski and Ride and many more pubs. :)

How to make a kitchen island with old wood doors and brackets by joanne palmisano

Here is a project I did for HGTV and DIY NETWORK. An 8-part video series on Designing with Salvage Material. We created this kitchen island using old doors (we cut to use the bottom 2/3 of the door) and vintage brackets and a piece of copper for the top. These doors are actually the color we found them and the brackets as well. We just gave everything a coat of poly to see the chippy paint. This design style perfect for a country house but with only a few minor changes it would work well for a rustic modern or farmhouse style house. Just picture it painted all black — or all white — or stripped down to its natural wood color. Just these easy simple changes could transform the design look and feel — while still using the architecturally reclaimed pieces.

Ah… the days when someone else did my hair and makeup… oh wait — this is about salvaged wood…

Remember — when you are looking at salvage materials — including old doors — see what they can be — not what they are at that moment. This amazing interior designer, Kelly Giesen, shows us in her New York City apartment how to create a high-end glamourous look with all her salvage finds. All the doors are reclaimed she found at her local architectural shop — then she had them painted in a high-gloss white and added mirrors to some of them. Drop dead gorgeous — proof is in the pudding — old doors have a ton of character and charm — but can be made to look modern and bespoke at the same time!! It was a blast to photograph Kelly’s entire apartment and have it be in our Success Stories chapter of our book, Salvage Secrets Design and Decor.

VINTAGE/ANTIQUE WOOD PIECES (as fixtures, furniture and decor)

Okay, we could go crazy here — the hundreds of ways I’ve used old wood furniture and decor pieces in design, DIY and decorating is ridiculous. So I’ll just show you a few to get your juices flowing…

One of my favorite tricks of the trade… turning old wooden dressers into amazing modern vanities. They add charm and character — and not to mention — super functional. (BTW— I WOULD NEVER CUT UP a true antique piece. If you don’t know the backstory of a piece you are thinking of cutting into — ask the person you bought it from or our favorite antique dealer.) Great team on this project! Award-winning!

Here is the before picture.. We added a black stain over it and updated the knobs. :)

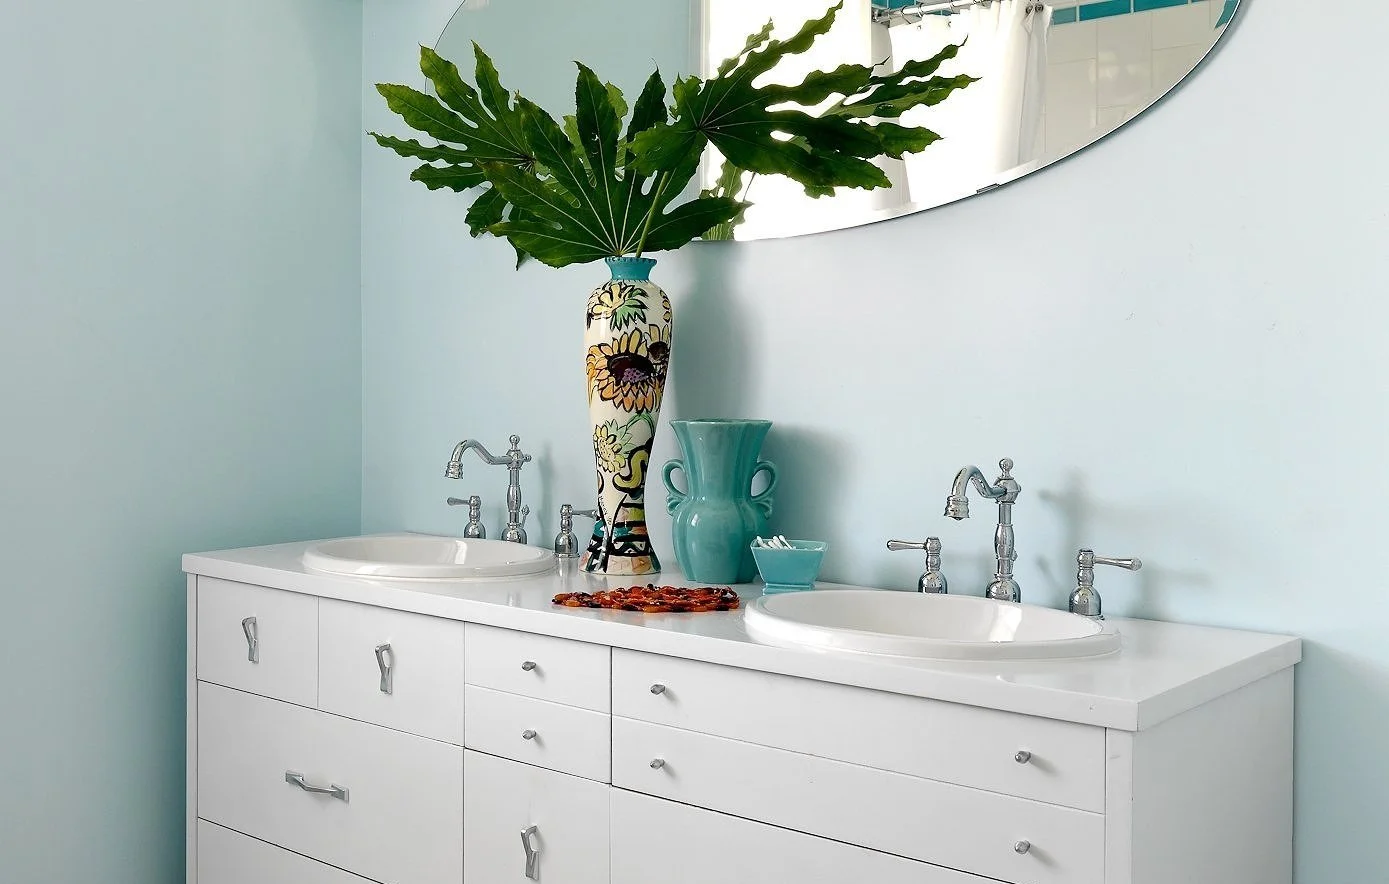
I mean… seriously — dresser to vanity — mic drop!! I did this project with my twin sister. We purchased this mid-century dresser at the Salvation Army for $50! Painted it white — spray painted the knobs — and dropped in the sinks. Then the plumber came and hooked up the faucets. Voila! Double Trouble DIYs. :)

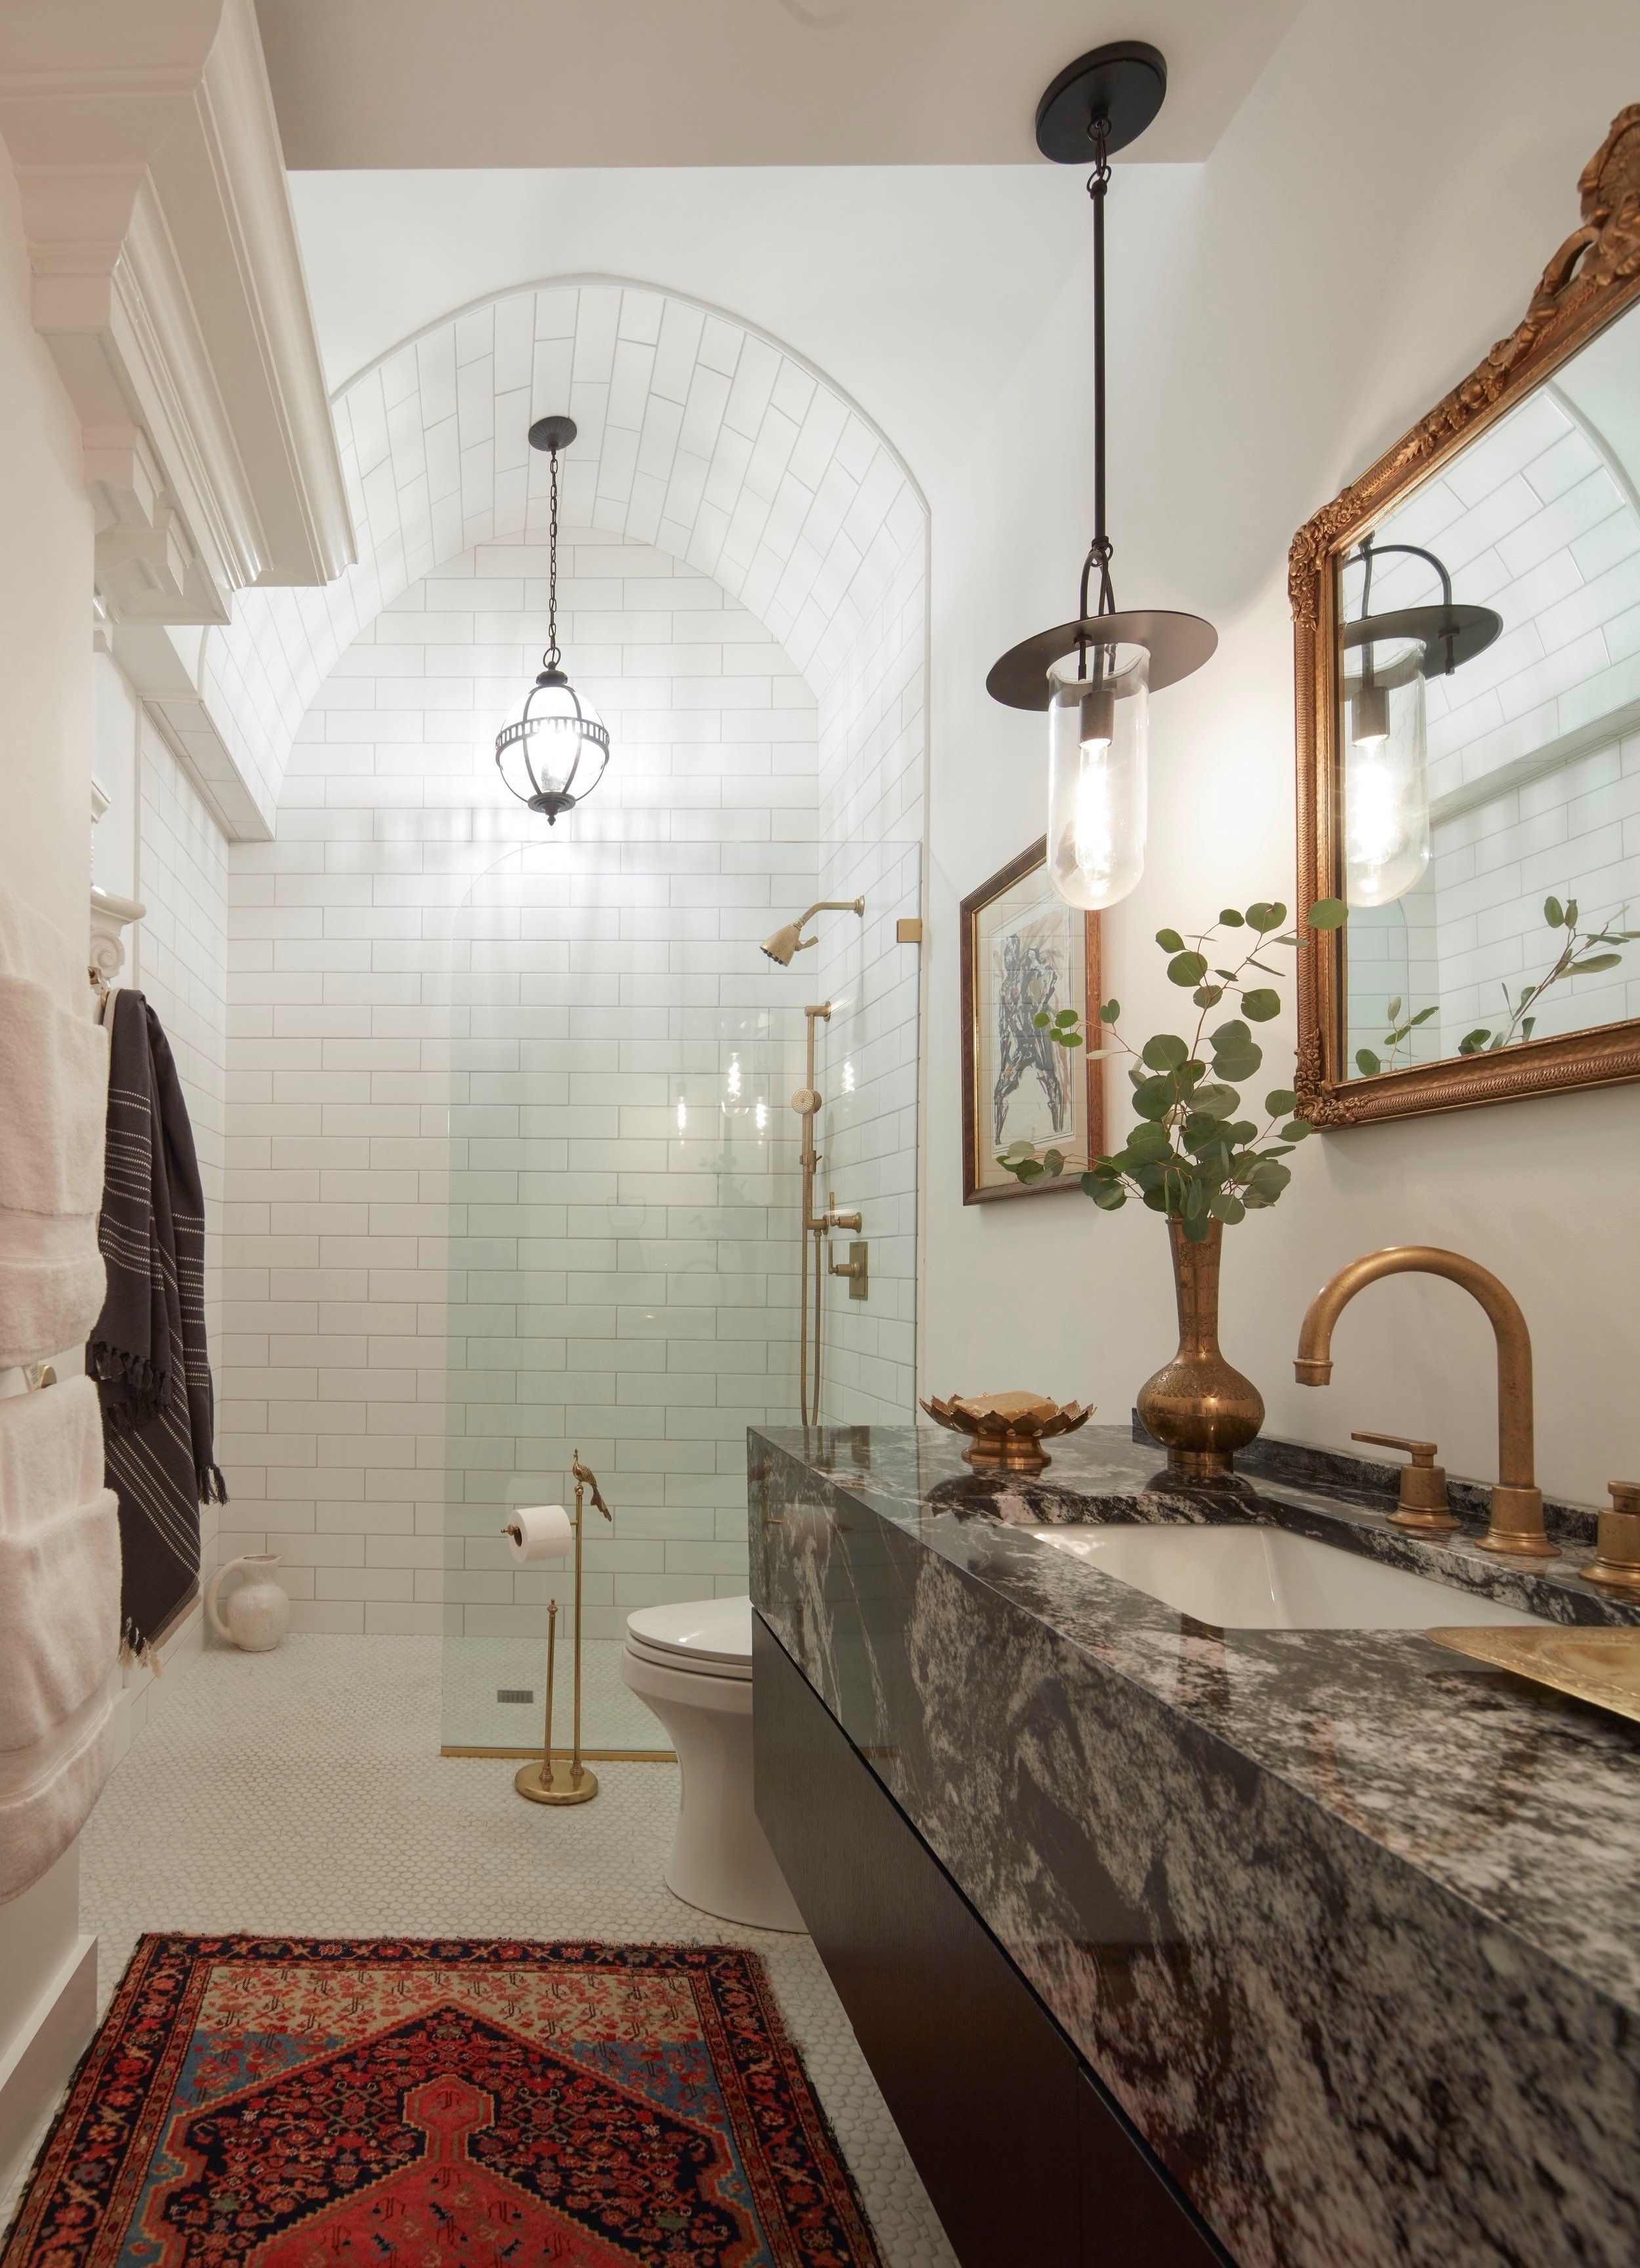
The amount of times I use vintage wood mirrors in a project — well… I cannot even count! This whole project (a must see) was a blast — and in all the of the bathrooms we used vintage wood mirrors. Such an easy way to add warmth and character (not to mention — old mirrors have the best glass — so for some reason I always look better in them. This luxury modern church turned into a home/condo was a fabulous project!!

Just buy and place. Doesn’t get any simpler than that! Vintage wood pieces are beyond measure! Seriously — you can never go wrong! This was a fun vacation rental project I helped renovate all via online (during Covid).

A tiny table, a step ladder, old cutting boards, frames, wooden spoons… bespoke vintage and antique furniture and reclaimed pieces are beyond affordable. Plus — these one-of-a-kind pieces will make your project stand out! The quality of the materials are hard to find today — and if they were built the exact same way — they would not be unaffordable. The saying Oldie but Goodie holds true for unique wooden treasures.

Old Wood Kitchen Cabinet Turned Coffee Table DIY project is featured in my book, Salvage Secrets Design and Decor. Found objects will make your interior design project stand out!

Get out there and have some Reclaimed Fun! XOXO Joanne

BEFORE and AFTER of a MINI MOTEL MAKEOVER -- TWICE AS NICE :)

TWICE as NICE…thanks to working with my twin sister Rosanne Palmisano. Super fun to help Daniel, the new owner of the Dunsmuir Inn (now The Angler Lodge) in Dunsmuir, California.

With this SUPER BUDGET FRIENDLY mini-makeover, together, we show how you can STILL have BIG RESULTS with LESS TEARING OUT. :)

ENJOY THE BEFORE AND AFTER FUN! XOXO Joanne and Rosanne

BEFORE: A very respectable room… just no pizzazz.

AFTER: Now we’re talking!!

We kept the furniture because it was in good condition, as well as the new mattresses… but updated the paint, walls, and added a dramatic wallpaper on the bed wall. We got rid of the upholstered furniture and rearranged the space to have a little more room around the pieces and have the space be more inviting. We also added relevant decor. Voila!

BEFORE: Again, not bad, just nothing to grab you and saying — STAY HERE! :)

AFTER: Now we are talking! Seriously people, it is not rocket science, pillows that fit the bed, two per person, a custom (washable) throw pillow, a little greenery, a modern lamp, and a dramatic wall covering… just a couple of changes — makes this furniture look totally different.

BEFORE: A bit outdated for sure. Also — not utilizing the space to its best potential. Lights directing to the ceiling — certainly not going to help us put our makeup on. :)

AFTER: Still keeping the cost down, we changed out the counter to be real stone, added a wider apron for a more modern look and a shelf below for a bit more storage space. We changed out the paint colors, including an amazing datum line around the room, a better light fixture to really light up the space and more relevant art (it is now, The Angler Lodge).

BEFORE: The coffee machine was in the bathroom, the TV on top of the kitchenette, a light in a weird location… a lot to unpack here. But Rosanne and I had some ideas…

AFTER: We added a datum paint line around the room, except for the wallpaper wall (an easy and affordable way to add drama to a space). Then we used the same electrical box where the wall sconce was and “swagged” a light fixture to be over the kitchenette area. We moved the mirror to be behind the door. We hung up a larger TV and in the suites we added a table and some stools (the other rooms have benches). Now we can hang out and enjoy our dining area.

BEFORE: This lobby did its job, it was a space to check people in and that’s it. But now, a self-check-in motel, we didn’t really need the space, so how could we turn it into something the guests would enjoy? Hmmmmmmm…. thinking…. thinking….

AFTER: By creating an adventurer’s library of course! Being right on the Sacramento River, some of the best fly fishing in the country, backed up to Mt. Shasta, amazing hiking and more — we really wanted to speak to the area — and all the incredible sports and adventures available to guests. So with the same wallpaper we used in the rooms (bringing it all together), some rustic industrial style shelving, relevant decor, local area informational books, and super cozy seating in the middle of the space — guests can come in here and relax, grab a book, or do a little work. Our goal was to make it look like a luxury fishing lodge from the past… how did we do? :)

BEFORE: We didn’t want to make any big changes to the exterior, it was not in the budget, and the building was recently painted so it was in good condition, but a small change would not go amiss.

AFTER: Just a simple change of the door color transformed the exterior look of the building. Bring the bold blue from the inside out.

BEFORE: The Porte-cochere (a structure for vehicle passage) is no longer needed. What to do? What to do?

AFTER: Why turn it into a Portico (a structure for human entry). Simply add some blue Adirondack chairs, a gas firepit, potted greenery and voila, instant gathering spot for guests.

HOPE YOU LIKED THE BEFORE AND AFTER… HERE ARE A FEW MORE SNEAK PEAKS OF THE DESIGN CONCEPT…and DETAIL PICS.

Rosanne and I worked together to create the concept for the mini-makeover. Here is a page from our Vision Board.

Simple sketches help convey ideas…we love old school ways!

The details matter!! Custom pillow design from an upholstery grade fabric (with zipper for cleaning), a unique blanket and local relevant art! All put together beautifully.

AFTER: The Head Shot :)

LOVE IT when I get to work with my twin sister on Design Projects (Joanne on the left, Rosanne on the right).

Need to see more of our projects… Check out our BOOK!! Rock Your Rental, Style, Design and Marketing Tips to Boost Your Bookings — not just for the vacation rental market — but for anyone who wants to refresh their spaces in a budget friendly way. It is only $20 Bucks on Amazon.

Ciao for now! Joanne and Rosanne (the dynamic design duo — just made that up).

We hope you Get Inspired by our Boutique Motel Mini Makeover :) Joanne and Rosanne